
Walk into any high-end home renovation project right now, and there’s a good chance you’ll spot it — that rich, velvety, subtly textured finish on the walls that makes the whole room feel expensive and alive. That’s roman clay.
It’s not a trend that arrived overnight. It’s actually rooted in ancient Mediterranean building tradition, refined over centuries, and now experiencing a genuine renaissance in modern interior design. But here’s the thing — most people don’t really know what it is, how it works, or whether it’s the right choice for their home.
This guide covers everything. What roman clay paint actually is, how it differs from regular paint, what makes roman clay walls so visually striking, how to apply it properly, and which colors and finishes give you the best results. Whether you’re planning a full renovation or just reconsidering one accent wall, this is the most useful thing you’ll read on the subject.
What Is Roman Clay? The Honest Answer
So, what is roman clay, exactly?
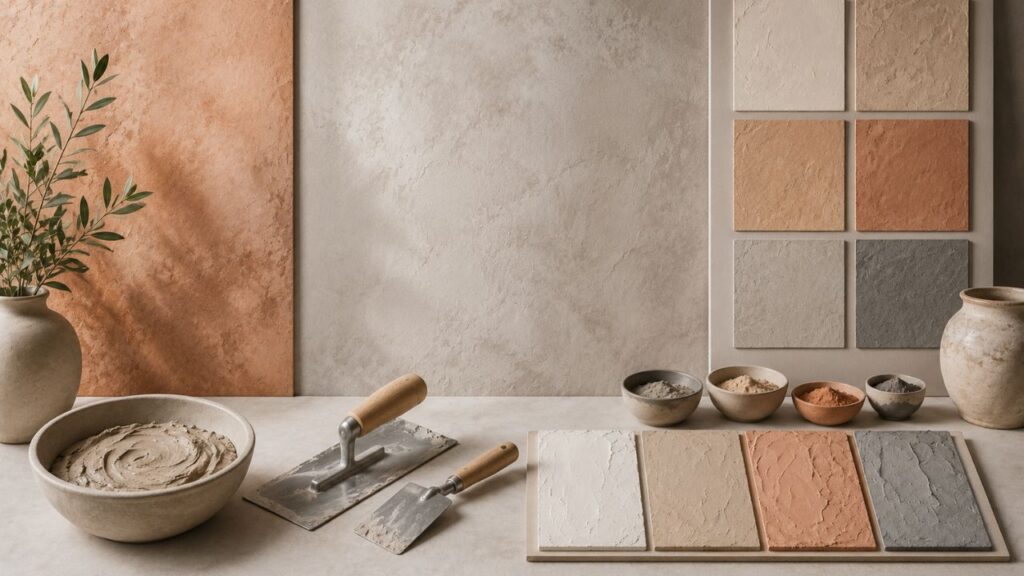
At its core, roman clay is a water-based, acrylic paint-plaster hybrid that’s formulated to mimic the look and feel of authentic Roman plaster — the kind used on walls of ancient Mediterranean buildings. Real Roman plaster was made from lime putty, marble dust, and mineral pigments. Roman clay is the modern, more accessible version of that.
The product most people refer to when they say “roman clay” is made by Portola Paints & Glazes, a California-based company. Portola Plaster (often called Portola Roman Clay) has become almost synonymous with the finish itself, in the same way people say “Kleenex” for tissues. But the category of roman clay products has expanded significantly, with competitors offering their own versions under various names.
What makes it different from regular wall paint? It has texture. It has depth. When light hits a roman clay wall, you see subtle movement and variation — almost like the wall itself is alive. That comes from the way the product is layered and burnished during application.
It’s not a flat, uniform coating. Each pass of the trowel or applicator creates a micro-variation in thickness, which catches light differently depending on the angle. The result is a three-dimensional effect that flat paint simply can’t achieve, no matter how good the color is.
Roman Clay vs. Other Plaster Finishes: What’s Actually Different
Before going further, it’s worth clearing up some confusion, because there are several products in this space and they get mixed up constantly.
| Finish | Base Material | DIY Friendly | Texture Level | Cost Range |
|---|---|---|---|---|
| Roman Clay | Acrylic/water-based | Yes, with prep | Medium | $$ |
| Venetian Plaster | Lime putty + marble dust | Moderate | High | $$$ |
| Limewash | Lime + water | Yes | Low-Medium | $$ |
| Traditional Plaster | Gypsum or cement | No | Medium-High | $$$$ |
| Regular Paint | Water or oil-based | Yes | Low | $ |
Roman clay sits in an interesting middle ground. It’s more sophisticated than standard clay paint or flat latex, but more forgiving than true Venetian plaster, which requires significant skill to apply correctly. The acrylic base means it dries more predictably, adheres to more surfaces, and holds up better in humid conditions than lime-based alternatives.
Paint for plaster walls is a whole separate conversation — when you already have plaster walls and want to coat them, roman clay is actually one of the better choices because it’s flexible enough to handle hairline cracks without telegraphing them.
The Visual Appeal: Why Roman Clay Walls Look So Good
There’s a reason roman clay walls have shown up in every design magazine, Instagram feed, and celebrity home tour for the past five years. The aesthetic is genuinely different from anything you can get with standard paint.
Depth and dimensionality. Because the product is applied in multiple thin layers — typically two to three — each layer adds visual depth. The underlying layers peek through at the edges and high points, creating natural tonal variation.
Light response. This is the real magic. As natural light moves through a room across the day, a roman clay wall changes. Morning light makes it look softer and cooler. Afternoon sun brings out warmth and texture. No two moments look identical.
Sophistication without busyness. Unlike wallpaper or bold paint colors, roman clay adds visual interest without competing with furniture, art, or architecture. It’s a backdrop that makes everything in the room look better.
The handmade quality. Every wall finished with roman clay is, by definition, unique. Two walls finished by the same person on the same day won’t be identical. That slight imperfection is the point — it signals genuine craftsmanship, something increasingly rare in spaces filled with manufactured materials.
Roman Clay Colors: Choosing the Right Palette
One of the most frequent questions people have is about roman clay colors — specifically, what’s available and how to choose.
The Portola Plaster Roman Clay line offers hundreds of colors, organized into palettes that range from stark architectural whites to deep, moody earth tones. But not all colors perform equally well in roman clay format.
Colors that work beautifully:
- Warm whites and off-whites — These show texture without being visually heavy. Think bone, cream, antique white. They make small rooms feel larger while still having presence.
- Warm neutrals — Putty, greige, camel, sand. These colors feel inherently earthy and connect well to the Mediterranean heritage of the finish.
- Terracotta and clay tones — Almost poetically appropriate. Rust, ochre, burnt sienna. These are dramatic and gorgeous in the right setting.
- Sage and muted greens — Calm, organic, surprisingly modern. Work exceptionally well in kitchens and bathrooms.
- Deep saturated tones — Charcoal, forest green, navy. High drama. Best used on a single accent wall or in a room with strong natural light.
What to avoid: Very cool, blue-leaning tones can look flat in roman clay because the texture doesn’t enhance blue undertones the way it does warm ones. Bright, saturated primaries can also look chaotic — the texture and the intensity fight each other.
Practical tip: Always get a sample and apply it on the actual wall surface in large patches. Roman clay looks completely different on a paper sample card than it does layered on a wall. The texture and depth only become apparent at scale.
Roman Clay Texture: Understanding the Surface
The roman clay texture is what separates it from every other decorative coating. But “texture” is a somewhat misleading word here — it’s not rough or raised in any obvious way. Run your hand across a finished roman clay wall and it feels smooth, almost polished. The texture is visual, not tactile.
Here’s how it works:
The product is applied in thin, overlapping layers using a flat Japanese trowel or similar applicator. The motion is typically wide, arc-shaped sweeps that leave micro-ridges and thin spots. When a second layer is applied, it doesn’t fill those variations perfectly — it creates new ones on top of the old ones. The result is a surface with subtle topographic variation that measures in fractions of a millimeter but reads visually as depth.
The final burnishing step — going back over the dried surface with a clean trowel — compresses and polishes the top layer without removing it. This is what creates that characteristic slight sheen, different from both flat paint (too matte) and gloss paint (too reflective). It’s closer to the surface of a worn, polished stone.
The roman clay wall finish can be adjusted based on application technique:
- More texture: Apply with less overlap, allow to dry slightly before each stroke
- Less texture, more polish: More overlap, wetter application, more aggressive burnishing
- Varied effect: Mix approaches intentionally for an organic, aged look
Roman Clay Application: How the Process Actually Works
Roman clay application is one of those things that sounds complicated until you understand the basic logic. Then it makes sense.
What You Need
- Roman clay product (Portola or equivalent)
- Japanese trowel or flat finish knife (6–10 inch)
- Drop cloths and painter’s tape
- Clean rags
- Primer (appropriate for your surface — see below)
- Mixing paddle and bucket
- Good lighting (critical for seeing what you’re doing)
Surface Preparation
This is where most DIY mistakes happen. The surface must be:
- Clean — no grease, dust, or residue
- Sound — no loose paint or crumbling plaster
- Primed — with a tinted primer matched to your roman clay color
The primer step is non-negotiable. Roman clay is applied in thin layers and the primer color shows through in thin spots. If primer and top coat are mismatched, those spots will look like mistakes rather than texture.
Step-by-Step Application Process
How to apply roman clay follows a fairly consistent sequence across most products and most finishers:
Step 1: Prep and prime. Fill any significant holes or cracks with lightweight spackle. Allow to dry, sand smooth. Apply tinted primer to the entire surface. Let dry completely (typically 2–4 hours).
Step 2: First coat. Load the trowel with a small amount of roman clay — less than you think you need. Apply in sweeping arcs, keeping pressure light and consistent. The first coat should be thin. You’re building a base, not trying to achieve the final look. Overlap passes by about 30%. Allow to dry fully (1–2 hours depending on humidity and temperature).
Step 3: Second coat. This is where the character comes in. Apply the second coat at a different angle from the first — cross-hatching creates depth. Vary your pressure slightly across the wall to create natural tonal variation. Allow to dry until just slightly tacky.
Step 4: Burnish. Using a clean, dry trowel, go back over the surface with smooth, overlapping strokes under firm pressure. This polishes and consolidates the surface. You’ll see it change as you work — developing that characteristic sheen.
Step 5: Optional third coat or glaze. Some painting and plastering services recommend a third thin coat in high-traffic areas or on surfaces that will be handled frequently. A topcoat wax or glaze can also be applied for additional protection and sheen.
Roman Clay Plaster: When to Call a Professional
Let’s be straight about something: roman clay plaster application is accessible to motivated DIYers, but it’s not the same as painting a wall with a roller. The learning curve is real, and the first wall you do will probably not look as good as the fifth.
For most homeowners, the decision comes down to this:
DIY makes sense when:
- You’re doing a small room or single accent wall
- You’re comfortable with the trial-and-error aspect
- The imperfect, handmade look is actually what you want
- You have time and patience
Hiring painting and plastering services makes sense when:
- You’re doing multiple rooms or a large home
- You want a specific, consistent finish throughout
- You’re on a tight timeline
- The surfaces are challenging (high ceilings, arched doorways, complex architectural details)
- You want a professional-grade outcome with guarantees
A skilled plasterer or specialty finisher will charge significantly more than a standard painter, but the difference in quality on a technically demanding application is substantial. Roman clay done well is extraordinary. Done poorly, it looks like mistakes on a wall.
When interviewing painting and plastering services, ask to see completed roman clay projects — ideally in person, not just in photos. Photos can hide a lot of inconsistency.
Roman Clay Paint for Existing Walls: Special Considerations
A common situation: you have existing painted walls or plaster walls and want to apply roman clay over them.
Paint for plaster walls is generally straightforward, but roman clay over existing coatings requires attention to a few specifics:
- Existing paint must be firmly adhered. Test by pressing tape firmly to the wall and pulling it off. If paint comes with it, that’s a problem. You’ll need to strip or skim coat before proceeding.
- High-gloss surfaces need scuffing. Roman clay won’t bond well to very glossy paint. Lightly sand or use a deglosser before priming.
- Textured walls are complicated. If you have orange peel or knockdown texture, roman clay will settle into those textures and amplify them rather than replacing them. Most people skim coat first to get a flat surface.
- New drywall is ideal. Fresh, properly primed drywall gives you the best canvas for roman clay work.
Portola Plaster specifically recommends their own primer for best adhesion and color accuracy, and in this case the manufacturer recommendation is worth following.
Maintaining Roman Clay Walls
Once you have roman clay walls, the question becomes how to keep them looking good.
The good news: sealed roman clay is surprisingly durable. Regular cleaning with a damp cloth handles most marks. For greasier spots (common in kitchens), a small amount of mild dish soap works fine.
The things to avoid:
- Abrasive scrubbing, which can remove the burnished surface layer
- Strong alkaline cleaners, which can affect the finish
- Excessive moisture over long periods (bathrooms benefit from a clear topcoat sealer)
Over time, roman clay can develop additional character — very light wear marks and patina that, honestly, often look intentional and beautiful. This is different from how flat paint ages, which typically just looks tired.
Cost Considerations: What to Actually Budget
Roman clay costs more than standard paint — both the material and the labor. Here’s a realistic breakdown:
Material cost: Portola Plaster Roman Clay runs approximately $100–$140 per gallon. Coverage is roughly 75–100 square feet per gallon for two coats, depending on application technique and surface absorption.
Labor cost (professional): Specialty finishers typically charge $8–$15 per square foot for roman clay application, depending on complexity, location, and ceiling height.
DIY cost: Material plus primer, tools, and supplies runs about $150–$250 for a standard bedroom-sized accent wall.
For a full room professionally finished, budget $2,000–$5,000 depending on size and complexity. That’s a significant investment — but compared to wallpaper at similar price points, roman clay offers more customization and better longevity.
Roman Clay in Different Rooms: What Actually Works
Living rooms and dining rooms: The ideal setting. Large walls with good natural light show roman clay at its best. Any color works here.
Bedrooms: Beautiful, especially in warm neutrals and deep earth tones. Creates the cocoon-like atmosphere that most bedroom design aims for.
Kitchens: Works well on non-splash areas. Feature walls and upper cabinets are popular applications. Avoid behind the stove without a clear sealer.
Bathrooms: Possible with proper sealing — two coats of a penetrating sealer are recommended. Not ideal in shower enclosures or areas with direct water exposure.
Hallways: Often overlooked, but hallways are an excellent place to do something bold with roman clay. Dark, saturated colors work well in narrow spaces where you wouldn’t risk them in larger rooms.
Exterior applications: Generally not recommended for standard Portola Roman Clay, which is formulated for interior use.
FAQ: Roman Clay Questions Actually Answered
Is roman clay real clay?
Not in the traditional ceramic sense. Modern roman clay products like Portola Plaster use acrylic binders with colorants that mimic the look of natural clay and Roman lime plaster. Some versions incorporate mineral additives for additional texture and authenticity.
Can I apply roman clay myself?
Yes, but expect a learning curve. Your first wall will teach you a lot, so start with a low-visibility area or practice on a piece of drywall first. The roman clay application technique takes a few passes to feel natural.
How long does roman clay last?
With proper preparation and application, roman clay walls can last 15–25 years without needing to be redone. It holds color well and doesn’t crack or peel the way flat paint can.
Can roman clay be painted over?
Yes. If you ever want to change the finish, you can prime over roman clay and repaint with any standard product. The texture may telegraph slightly through a single coat of paint.
Is roman clay the same as Venetian plaster?
No, though they’re related. Venetian plaster is a true lime-based product requiring more skill to apply and achieving a more marble-like, high-gloss finish. Roman clay is more textured and matte, and more forgiving to apply.
What’s the difference between roman clay and limewash?
Limewash is applied with a brush and has a distinctly brushed, cloudy appearance. Roman clay is applied with a trowel and has a more uniform, smooth texture with subtle depth. Both are beautiful, but they read differently in a space.
Does roman clay work on ceilings?
Technically yes, but application on ceilings is significantly more difficult and is generally recommended only for experienced applicators.
Can roman clay be used on furniture?
Yes — it’s become popular on pieces like nightstands, dressers, and decorative objects. Application on curved or detailed surfaces requires smaller tools and more patience.